iOS앱 TestFlight에 배포하기
On this page
❐ App Store에 앱 등록 및 정보 입력하기
App Store에 앱 등록 및 정보 입력하는 방법은 여기서 자세히 설명하겠습니다.
❐ iOS 인증서 생성하기
CSR 파일 생성
CSR 파일 생성 방법은 여기서 자세히 설명하겠습니다.
Identifier 생성
Identifier 생성 방법은 여기서 자세히 설명하겠습니다.
Certificate 생성
Certificate 생성 방법은 여기서 자세히 설명하겠습니다.
Provisioning Profile 생성
Provisioning Profile 생성 방법은 여기서 자세히 설명하겠습니다.
❐ 앱 빌드 정보 및 환경 설정
앱 버전명 변경
Targets 선택 > General 탭 선택 > Identity > Version, Build 값을 입력합니다.
- Version : 앱 버전명 입력
- Build : 빌드 버전명 입력

Debug/Release모드 선택
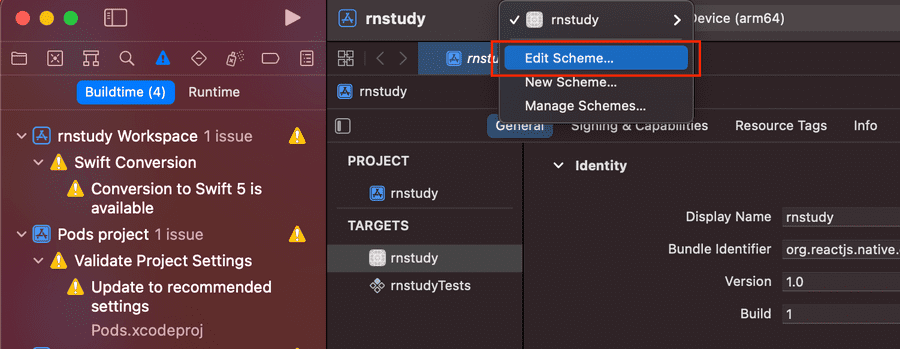
Edit Scheme 메뉴를 클릭합니다.
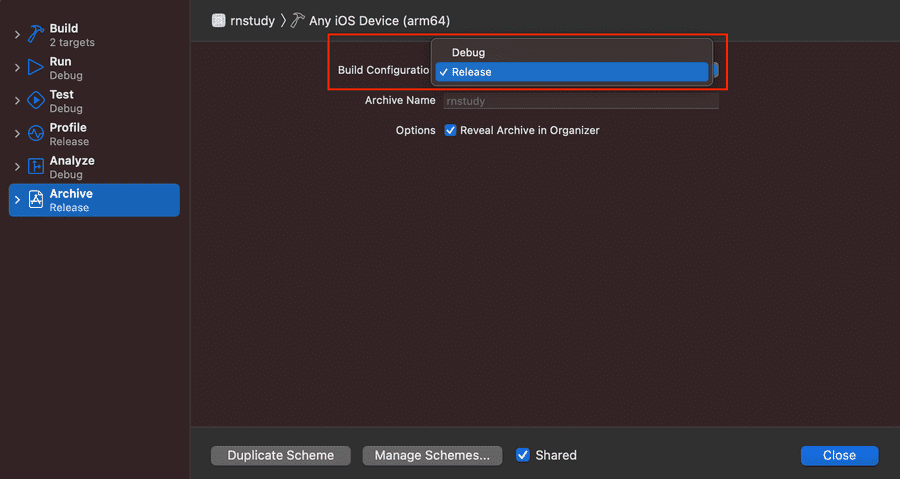
 Archive 진행 시 Debug모드로 할 것인지 Release모드로 할 것인지 선택합니다.
❐ iOS앱 TestFlight에 업로드하기
Archive 진행
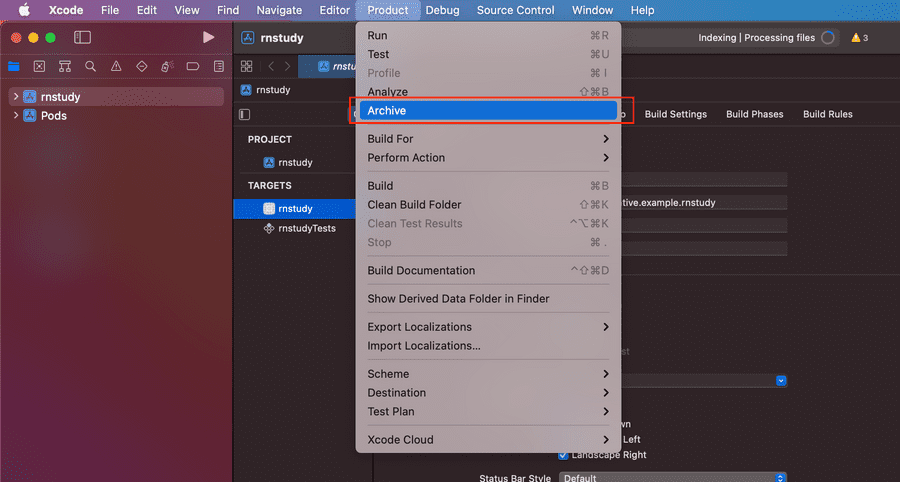
Any iOS Device를 선택합니다.
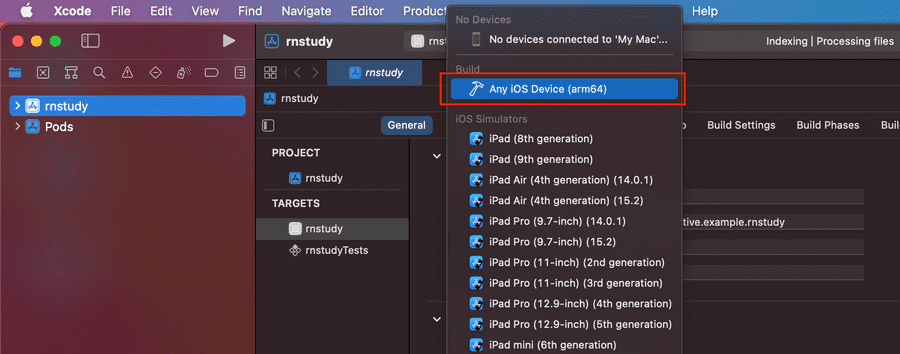 Product > Archive 메뉴를 선택합니다.
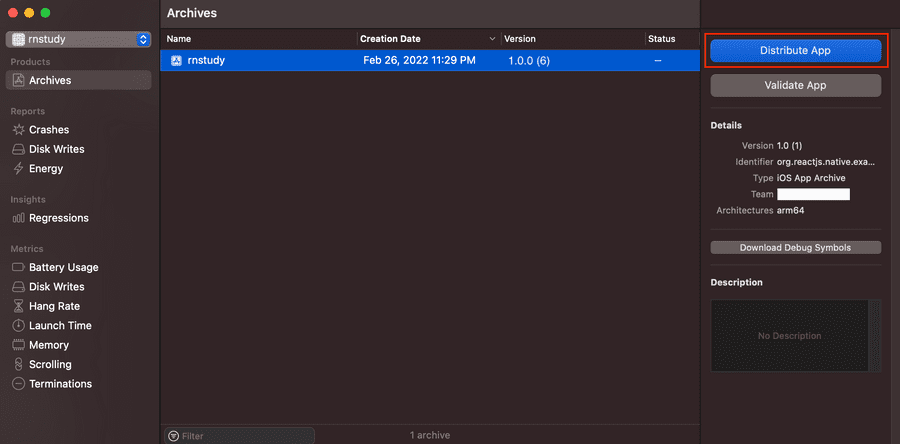
업로드할 앱 버전 선택
업로드할 앱 버전 선택 > Distribute App 버튼을 클릭합니다.
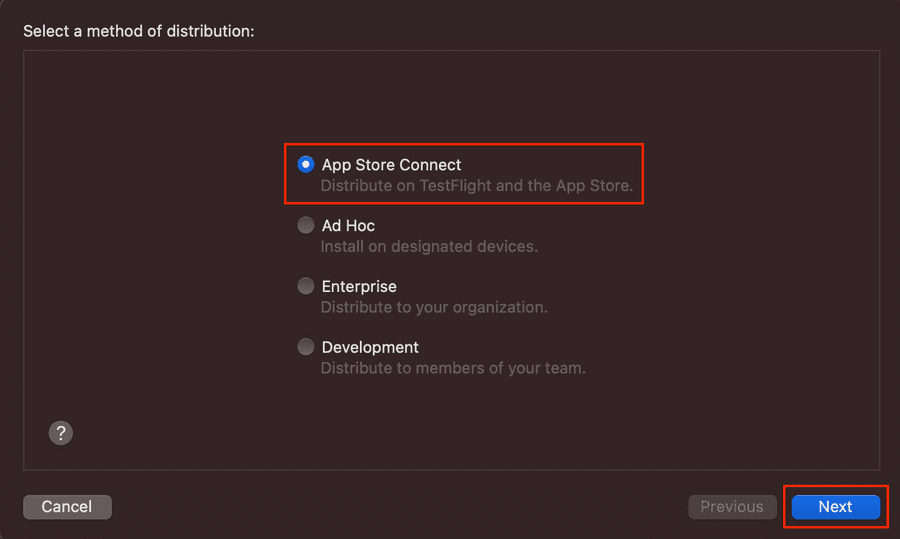
배포 방식 선택
App Store Connect 선택 > Next 버튼을 클릭합니다.
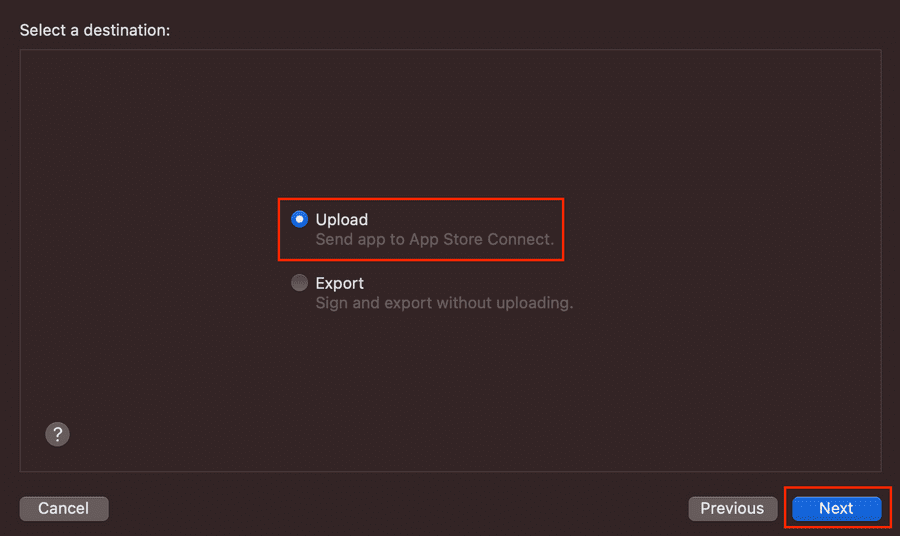
앱 생성할 목적지 선택
Upload 선택 > Next 버튼을 클릭합니다.
- Upload : TestFlight에 바로 업로드
- Export : ipa 파일로 앱을 내보내기 (Transporter 앱을 이용하여 ipa 파일을 TestFlight에 업로드할 수 있습니다.)
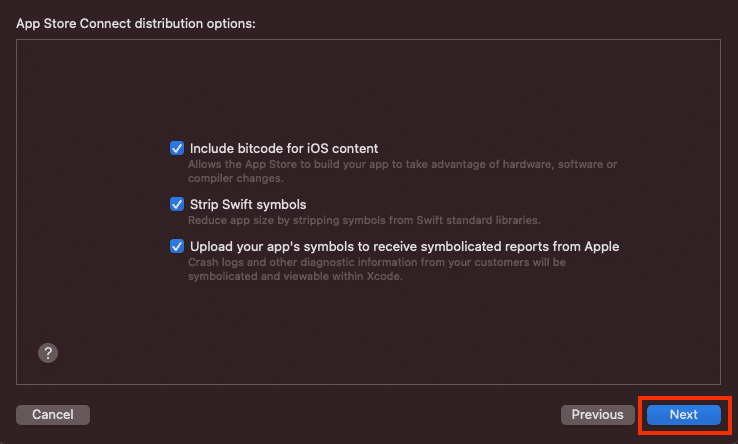
배포 옵션 선택
기본 상태 그대로 옵션 선택 > Next 버튼을 클릭합니다.
인증서 선택
배포 인증서, 프로비저닝 파일 선택 > Next 버튼을 클릭합니다.
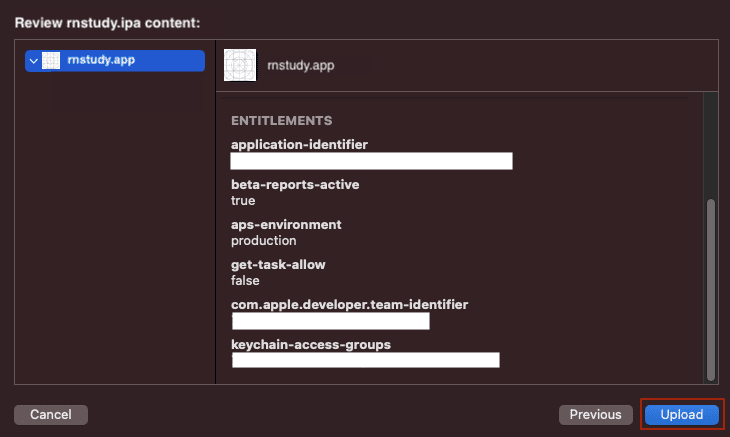
앱 정보를 확인한 후 Upload 버튼을 클릭합니다.
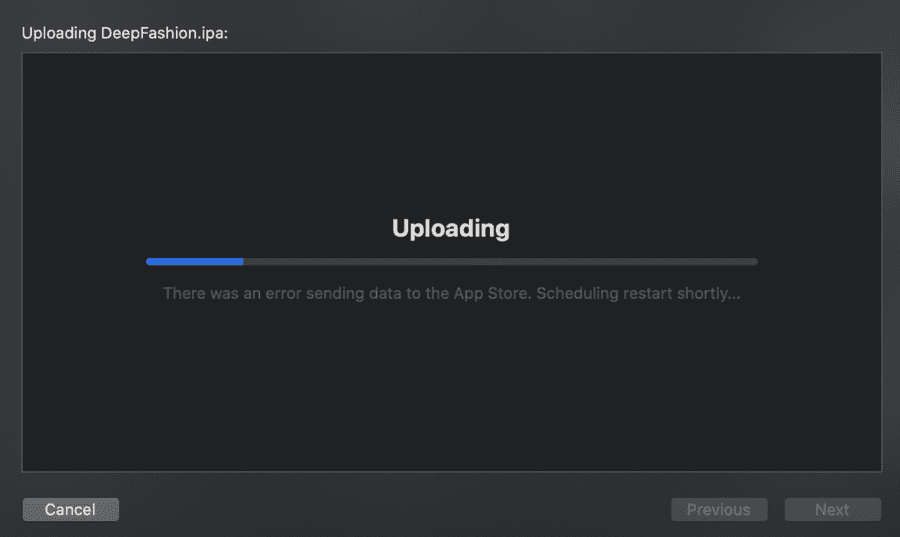
TestFlight에 앱 업로드
업로드 중으로 기다립니다.
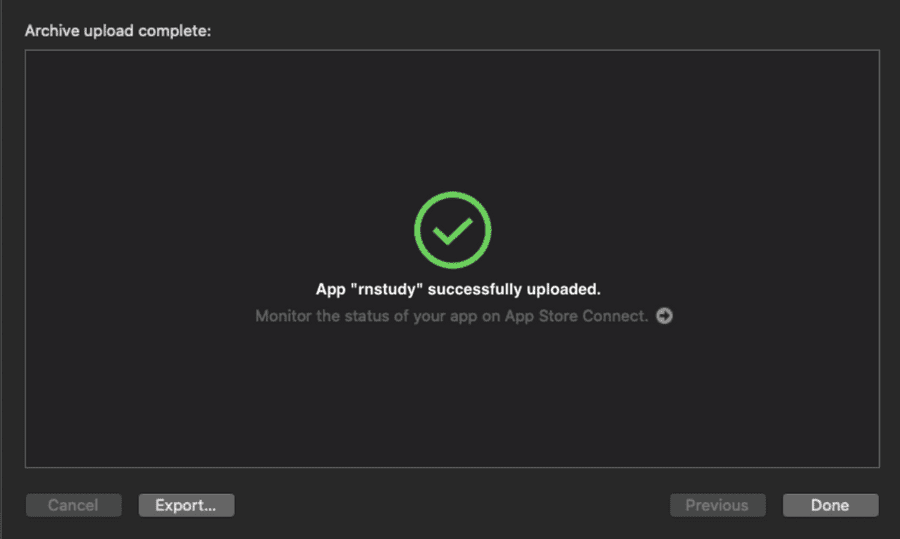
업로드 완료가 되었습니다.
❐ TestFlight에 앱 업로드 확인
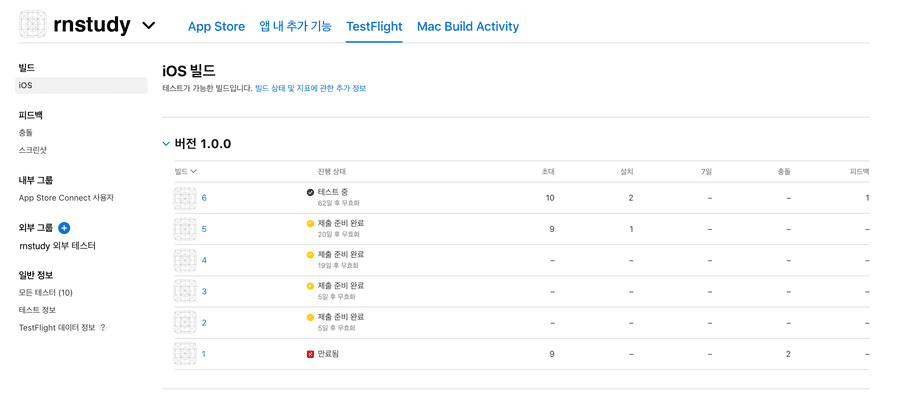
App Store Connect 사이트 > Testflight > 빌드 > iOS 메뉴를 선택 합니다.
TestFlight에 업로드한 앱 버전들을 확인할 수 있습니다.
업로드 직후에는 처리중 상태이며, 10~20분 후에 제출 준비 완료 상태로 변경됩니다.
제출 준비 완료 상태로 변경되면 TestFlight앱을 통해 테스트앱을 다운로드 받을 수 있습니다.
